Hatching Eggs? 🥚 7 Steps to Incubation Success 🐣
JamesSuccessful egg incubation begins with high-quality fertile eggs. These eggs contain living cells capable of developing into viable embryos and chicks. Factors affecting fertility include the age, temperature, health, nutrition, and genetics of the breeding stock.
- Proper egg collection and storage are crucial. Store eggs at 55-65°F with 75% relative humidity for no more than 10 days. Handle eggs carefully and turn them regularly if stored for over a week. For a deeper dive into egg storage practices, check out our guide on Proper Egg Collection and Storage for more tips and detailed recommendations.
- Incubator management is key to successful hatching. Use a forced-air incubator if possible, maintaining a temperature of 99.5°F and relative humidity of 58% during the set stage. Turn eggs at least five times daily until the last three days of incubation. Don't use manual incubator as possible.
- During incubation, monitor embryo development through candling. This process helps identify infertile eggs or early embryo deaths. Keep detailed records of temperature, humidity, and turning schedules.
- For the hatch stage, increase humidity to 65-70% and decrease temperature slightly. Stop turning eggs and provide a cloth or rough paper for chicks to walk on .
- Common problems include infertility, early embryo death, and malpositions. These issues can often be traced back to improper incubation conditions or breeder flock health.
- After hatching, move chicks to a warm brooder and provide water and feed. Calculate and record fertility percentage, hatchability percentage, and total eggs hatched percentage to evaluate efficiency.
Remember, successful incubation requires attention to detail, proper environmental control, and consistent monitoring throughout the process, and the Bobmail APP can help you a lot!
Here are 7 steps you should know.

Step 1: Set Up the Incubator
There are several key features on the Bobmail incubator:
- 🐣 Digital display for temperature, humidity, and hatch day countdown.
- 🐣 Automatic egg turning with a 3-day stop feature before hatching.
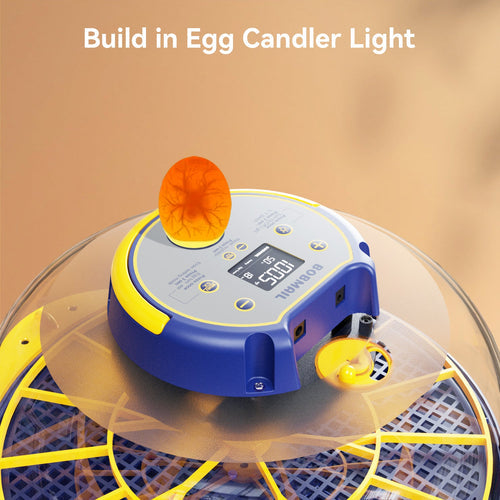
- 🐣 Egg Candle for monitoring embryo development.
Set up the incubator at least 12 hours before placing the eggs inside. This allows the environment to stabilize, making any necessary adjustments before incubation begins. Location is important! Place the incubator in a room with a constant temperature, away from drafts, windows, and direct sunlight, and ensure it’s out of reach from children and pets.
Step 2: Adjust the Environment
It takes 21 days to hatch chicken eggs. For successful hatching, the incubator needs the right temperature and humidity:
- Temperature: 99.5°F (acceptable range: 99-100°F). More temperature guide here.
- Humidity: First 18 days: 45-50%, Final 3 days: increase to 65-70%
Humidity levels can fluctuate, especially with seasonal changes. Add water to increase humidity and allow more fresh air intake to decrease it. Follow the incubator manufacturer’s directions to maintain optimal humidity.
Step 3: Set the Eggs

Do not set shipped eggs directly in the incubator upon arrival. Let them settle for 24 hours at room temperature to avoid cracking. Place them in an egg carton with the pointed end down, rotating the carton every 12 hours if holding them for longer than 24 hours. Before placing the eggs, mark one side with an X and the other with an O for proper rotation during incubation. Don't stack the eggs in the incubator for best result!
Step 4: Incubating, Days 1-17
For the first 17 days, turn the eggs by hand every 6 to 8 hours if you don’t have an automatic turner. This prevents the embryo from sticking to the shell membrane. Monitor temperature and humidity, adding water as needed. Candling on Day 7 and Day 10 will help you observe embryo development.
If any eggs show no signs of development by Day 14, remove them to avoid contamination.
Step 5: Lockdown, Days 18-20
During the final 3 days, known as “lockdown,” stop turning the eggs to allow the chicks to position for hatching. Increase humidity to around 65-70% and avoid opening the incubator. Prepare the brooder for the chicks’ arrival.
Step 6: Hatch Day: Day 21
On Day 21, you’ll start hearing peeping sounds from inside the eggs as chicks begin to hatch. Allow 24 hours for all chicks to complete the hatching process. Move the fully dry chicks to the brooder, but do not assist any struggling chicks.
Step 7: Clean Up
After all chicks have hatched and moved to the chicken brooder, thoroughly clean and disinfect the incubator. Avoid getting electrical parts wet to prevent damage.
Note: Reset the incubator to the correct incubation period (21 or 28 days) depending on the egg species. This ensures the automatic egg turner works correctly.


